



September 24, 2016
Problem:
I bought the MB Star diagnosis SD connect C4 diagnostic system. I have installed the XDOS 2015.12V DAS Xentry on Dell D630 laptop, but it gave me two errors:
Error 1:
HHT-WIN display error "Internal fault Diagnosis multiplexer Code:10766â€

Error 2:
Fault (1.2) Initialization of diagnosis multiplexer failed.

Possible reason:
1: HHT error:2015.12 or newer 2016V Star diagnosis software does not come with HTTWIN software. If you need to troubleshoot old Mercedes, better go for Star software pre-2015.09V.
2.Multiplexer failed:We can see from the error screenshot, MB SD connect C4 icon didn’t show on the status bar which indicates you have not set the SD Connect C4 correctly, so the MB SD C4 is not well communicate with vehicle.
http://mbsdconnect4.blogspot.com/2016/09/how-to-solve-hht-win-internal-fault.html
Posted by: mbbenzstar at
02:00 AM
| No Comments
| Add Comment
Post contains 128 words, total size 3 kb.
September 13, 2016
Step 1 – Remove the old fluid from the reservoir

Step 2 – Install the brake bleeder
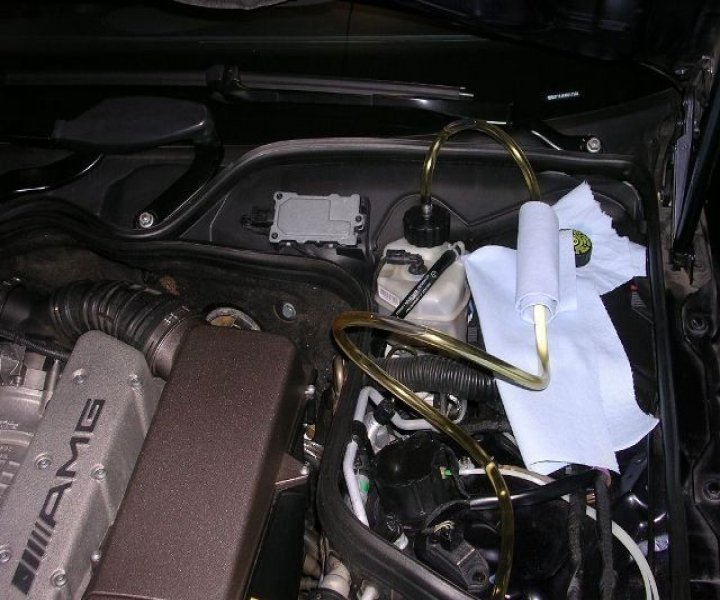
Step 3 – Build the pressure to 2 bar (29 PSI)

Step 4 – Begin the bleeding procedure


Step 5 – Finish the bleeding procedure


Step 6 – Re-install the plastic reservoir cover

Posted by: mbbenzstar at
03:27 AM
| No Comments
| Add Comment
Post contains 881 words, total size 12 kb.
September 09, 2016


 I can line up the wires with connector and reference it with the ABCDEFGHI..etc on the multiplexer if I knew which color connect to which pin on the cable connector. Unfortunately there are too many wires loose in there for me use trail and error. Reference: RS232 to RS485 cable pinout RS232 cable pinout:
 if i good see,this 232 box emtycheck com to 4851-2-N M3-N4-H5-LPST6-K7-F8-G9-J RS485 cable pinout:electrically isolated RS485 communication interface to the PC serial port
 EIA-485 cable usually made with twisted pair (like EIA-422) and may span up to 1200 metres. The recommended arrangement of the wires is as a connected series of point-to-point nodes, a line or bus. Ideally, the two ends of the cable will have a termination resistor connected across the two wires and two powered resistors to bias the lines apart when the lines are not being driven. The value of each termination resistor should be equal to the cable impedance (typically, 120 ohms for twisted pairs). The pinout, simply put, is that colors connect to the following pins
 urple - Pin 8Yellow - Pin 5Orange - Pin 9 (or Pin 4), on one schematic I looked at they are bridged.Looking at that schematic (I'll link to it below), purple connects to "G" (which is not the G on the cable because the letters are flipped in the key on the schematic!). It looks like Yellow connects to "R". With the help online, I've fix the cable.I've tested my cable and it works now. Great!
 wiring instruction here...definitely easier to understand...good for those not very well versed in reading schematics above... Wish it helps If the cable is unluckily broken to death, recommend you all to use the one with golden box from mbstartool. It’s said that that’s the best quality RS232-RS485 cable.
 http://mbsdconnect4.blogspot.com/2016/09/repair-bad-rs232-to-rs485-cable-for-mb-star-c3.html
Posted by: mbbenzstar at
01:49 AM
| No Comments
| Add Comment
Post contains 357 words, total size 6 kb.
September 08, 2016

Solution shared by customer:
I fixed it.
Updated firmware in MB SD C4 interface and new key
How to update SD Connect C4 firmware?
http://www.mbstartool.com/upload/service/second-step-update-sd-connect.pdf
http://blog.mbstarshop.com/2016/09/08/sd-connect-c4-internal-error-csd-dll-not-found/
Posted by: mbbenzstar at
02:19 AM
| No Comments
| Add Comment
Post contains 65 words, total size 1 kb.
September 05, 2016


2005 SLK350; Troubleshot the Vario Roof to a Roof Closed switch that was stuck in the closed position.
Used it on my wifes 08 ML320 CDI after an in-tank fuel pump failure and also to verify injector performance.
Used it on my Daughters 05 E320 CDI; basically got a baseline after purchasing the vehicle used.
1996 S320. Somewhat limited and not nearly as comprehensive as the later vehicles. Uses the 16 pin under hood adapter instead of the OBDII port. Vehicle belongs to a friend. Tester isolated a stalling and rough idle condition to a faulty MAF sensor.
Recently purchased an 04 W211 Wagon. Used the system to perform a pre-purhase inspection and system baseline.
All works like a champ. Setup of the SD Connect was relatively easy; took a couple of days as you will have to email the required info to MB Star and wait for morning to get the info and then email them additional info. Folks were quite friendly and helpful during the process. The only thing I might do different is I would consider ordering with the SSD (
Posted by: mbbenzstar at
03:15 AM
| No Comments
| Add Comment
Post contains 232 words, total size 3 kb.
September 01, 2016
This is a user contribution of Daimler AG – Mercedes Benz MB Star diagnosis
Free download:
Released application for Windows running on x86/x64
Prerequisite is .net framework 4.5.2
What can be change in PL70 program?
There are 4 different variables that can be changed.
1."currency_symbol†– the currency symbol or format that will precede the price
2."conversionrate†– the rate between the currency in your current file and the currency you would like.
3."defaultPricelist†– the name of the baseline/default installed pricelist
4."convertedPricelist†– the name of the new pricelist
To run you will need Python 2.7
Run with"python PL70-converter.pyâ€
There is no longer a need for python.
Download theMBPLConverter.rarand install on the machine.
Change above variables accordingly and enjoy your new pricelist after running the script.
The script is currently set for Euro to NOK, and files are named accordingly.
Special thanks for fabek and fredr1kh’s share at mhhauto.
2016 Price list 70:


http://mbstar.blog.ru/221792787.html
Posted by: mbbenzstar at
03:25 AM
| No Comments
| Add Comment
Post contains 182 words, total size 4 kb.
32 queries taking 0.0269 seconds, 94 records returned.
Powered by Minx 1.1.6c-pink.

